Showing posts with label Pinterest challenge. Show all posts

Wednesday, August 31, 2016

Ice Krispies


  I want to share with you the best ice cream treat that will not melt.  It's still summer and there are a few hot days sprinkled throughout the week so take advantage of this tasty treat to cool off.


I'll take a chocolate cone please!

A few ingredients


and some creative construction and I have now learned will earn me points with my kids as well as a pretty cute end result.

  Melt your marshmallows down


and prepare the krispie treats as usual.


  I scooped out the tops with an ice cream cone scooper and added the side on by hand to give it an all around "perfect" scoop.

  I added some chocolate topping to the cone.  Melt chocolate chips and dip the cone (carefully) or drizzle/spoon chocolate evenly on the krispies top.


  Top your cone off however you please we went with sprinkles and a cherry on top!

  This is one of the cutest snacks I have made and I will make it again in the future.  I can't wait to change up the flavors maybe strawberry or mint chocolate chip next time.

  This was one of my Pinterest wins.  You can find that and other wins under that board title on Pinterest.

#pinterest
#pinterestwin

Friday, August 5, 2016

Kiwi Art (pinterest challenge)


  The kiwi otherwise known as the hairy fruit in my house was the star of the show today.  Still on my pinterest kick even if I'm not posting daily.  Searching for ideas is just as fun as creating.

  Today we are playing with food. I am always so fascinated with food art.  I haven't created much I usually prefer to just eat it my food but today I had some fun and played with my food.

First up was a mouse.


 He was really easy to make and although I didn't slice him in half nor add a tail he's kind of cute.  

All you need is a kiwi, a knife and some eyes (I used mini chocolate chips).  Slice out some ears and round them slightly, turn them around and stick them into some sits on the top of its head.  Add eyes be it seeds, chocolate chips or sprinkles.  That's it.

Next up was a snake or two!  This food idea was partly why I choose not to slice my mouse in half. 

 For this you just need to peel the skin off your kiwi and slice it so you have circles.  Cut your circles in half and alternate the half moon shapes.  Make a head (I used the end of the kiwi as it was rounded and one color) add a mouth and eye.  These eyes were seeds from a watermelon but again you can use anything on hand.

There you go folks.  Two kiwi options for your next fabulous food display.  You can find the full instructions on my pinterest challenge board.

I declare this a pinterest win!

Sunday, July 31, 2016

Let's Recycle with Pinterest


  Again in case you have never checked out Pinterest I will help you get acquainted with them.  They are a platform above any and all you have ever met.  It is a clearinghouse of everything.  If you want to make a cake, make your own play dough or make a dinosaur out of toilet paper rolls.  You will find several variations and several skill levels all available at your fingertips.

  Since I receive products I have a fair share of boxes, bubble wrap and tissue paper passing through so why not use some of that?  Today's lucky recycle job pertains to bubble wrap.  Did you know if you get enough bubble wrap in a week even kids stop playing with it.

I actually used a small piece of bubble wrap but if you have a larger piece your in charge of how many pieces or the size of your end result.
Shower cap
You also need construction paper
White paint
Glue

 The jellyfish!
  The jellyfish was so fun to see after we were done.  Grab a shower cap that you took from the complimentary bowl at the last hotel you stayed at! I know I'm not the only one to help myself. This makes this craft kind of free.  Cut strips from your bubble wrap.  How many tentacles is your call.  Glue them on around the bottom of the cap.  We hung ours in the door way but, with some fishing line and a few more jellyfish cut at multiple heights dangling down from your ceiling would make a pretty neat scene for an underwater party.

Mary had a little lamb!  My 3 year old made this craft.  I cut out the bubble wrap into the sheep shape and he did the rest.  He painted it white.  He glued the eyes and head on and then added the eyes.  This would be a great craft to accompany a certain nursery song or story pertaining to sheep!  Paint the sheep any color to accommodate your theme. (Baa Baa black sheep)

  There you go two ideas I pulled off Pinterest that I declare a #pinterestwin.   Minimal artistic talent necessary, accessible supplies and easy to make even if your trying to fill a short period of time.

Wednesday, July 13, 2016

Beans in the Brownies (pinterest challenge day 13)


  First off if your following me on Instagram you should have already seen my video if not jump over there for a short interrogation by my child.  She knew we were going to have brownies today but was not too sure about the use of beans.  I tried to tell her we had them before and all was well but she didn't remember probably because I didn't tell her about them.

  My challenge today was bean brownies!  Why not!  Do you think the more I actually let them know what's in their food the more likely they are to actually try it outside of what I cook it in?  Hmm, your probably right, probably not.  So until then I will randomly feed them goodies with veggies.  I look forward to the day one of them wakes up and says hey mom I'm feeling really healthy today what happened.

  There are so many options you can choose on Pinterest.  You can search just brownies but I selected bean brownies.  That was the easy part after that you have to scroll through dozens of option until your content with one.  Sometimes this is easy based on ingredients I have on hand, 3 ingredient recipes, no bake, or quick preps.  So many choices.  Lucky for you, you can always add them to a board or just like it so that it's saved for another day.

  Todays recipe was brownies with beans.
 

I added the batter to the pan and let the kids smell it before I put it in the oven.  I asked what it smelled like.  They could identify chocolate as they searched to see the beans.  Everything was run through the food processor so there was very little proof of them in the batter.


Brownies done and cooling.  They spent 18 minutes cooking and making the air smell delicious so when they were done, you couldn't help but want one.


Brownies are served better with a glass of milk


Supper easy recipe.  Everything goes in the food processor then poured in the pan.  The texture was the same as a traditional brownie.  The flavor was high in chocolate and no bean flavor at all.  The kids saw the whole process and still couldn't be stopped or slowed down with the beans. Chocolate trumps beans.  10 minutes of resting and I served up a piece to everyone.  The chocolate was still gooey and melted on your fingers.  2 kids loved these brownies and wanted more so you know what that means? #Pinterestwin!

  All my pinterest challenges can be found on my pinterest challenge board.

Tuesday, July 12, 2016

Healthy Muffins (pinterest challenge)


  So you know how your having a good day until your kids have plucked your last nerve.  Well I got them back today!  It seemed like I had to tell them multiple times to do several things today.  All of this during our celebratory dress like a cow at Chick Fil A and even after.  I even let them play on the playground.  

  Todays dinner was an easy one.  Hotdogs, mac and cheese and a side of carrots.  Only one of those is acceptable by the children.  However due to lack of time to eat ice cream at lunchtime the negotiation was all dinner had to be eaten before the ice cream was consumed.  One point for mom for that plan.  One poor child was compliant!

  Enter my devious plan to get those children.  Pinterest Challenge for day 12.  Muffins!

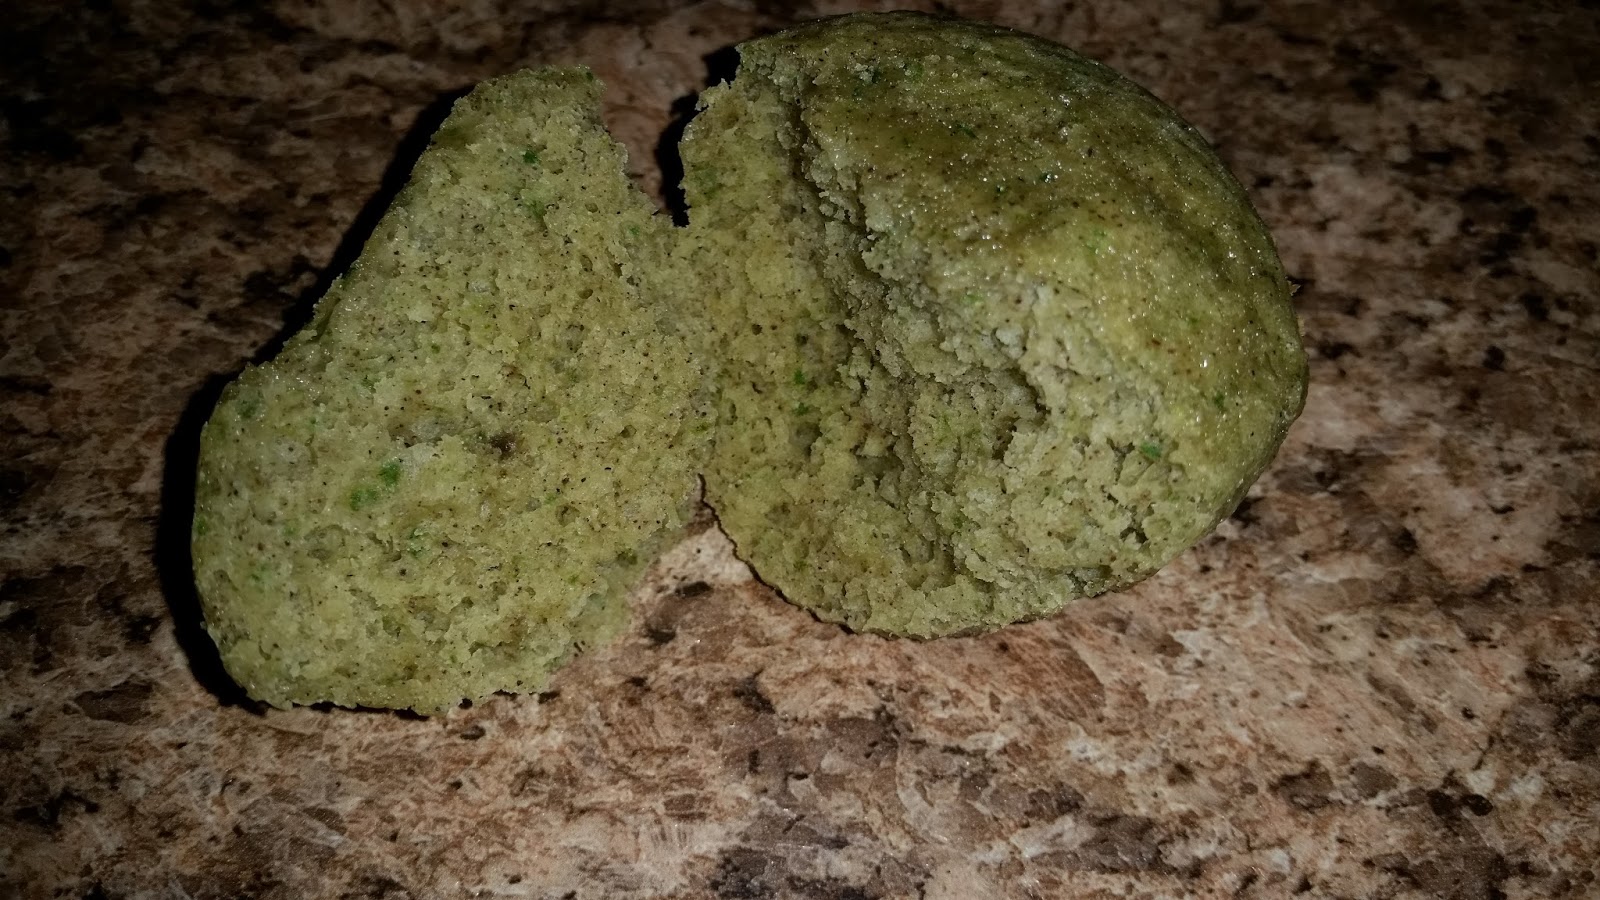
 Spinach muffins!  I'll show those kids.  The green I was concerned about but they are always trying to steal my pistachio muffins so I thought I was ok there.

  While they were napping I made this batch and worked quickly to get them in the oven before my plan was blown.  I had to make the dry ingredients bowl was complete before I turned on the blender.


Look what else gets thrown in! Bananas!


  All the dry ingredients got mixed with the wet mix from the blender then scooped into the muffin tray.


  They smelled amazing when they were cooking.  I m not sure if it was the bananas or the cinnamon.  Even when one child came down she said how good something smelled.

  Can I have a muffin, momma?  Yes, yes you can honey!  Can I just saw that was the first thing she took a bite of too.  She even let me know it smelled better up close.  However I did get multiple questions.  Why's it this color? Are there chocolate chips in here? What kind of muffin is it?  A good one that's what kind it is, lol.


  Who cares if it's a pea green unattractive color! This momma just fed her kids a muffin with bananas and spinach in it.  Hehe I feel almost evil.

  I would like to reduce the sugar (3/4 cups) and maybe up the spinach and bananas to make it a wee bit healthier.  The recipe was really easy to make.  Blending everything in a blender makes the mixing easier.  The recipe did have a quick prep time too.  I would have to say with 2 kids (other child ate one and tried several times to try and steal another) wanting second muffins this is a #pinterestwin!

Sunday, July 10, 2016

Stop and Smell the Flowers (Pinterest Challenge Day 10)


  Another craft project but one you or kids can make! Afterall aren't we always looking for something for the kids to do?  This project can even be given away which is a bonus.

  I picked up some tissue paper the other day for another craft that I probably will never do but hey; I am doing one now so it all worked out.

  Grab some tissue paper, a circle shape to trace, scissors and a pipecleaner.

  I actually picked up my tissue paper variety pack at the dollar store so I'm not breaking the bank.


 I used the lid of a container to make a circle shape and cut it out.  I folded the paper a few times so by the time I cut the circles it was about 10 circles or so.


  After that you make a hole to punch in your stem and pull some of it up.  I twisted the tip a bit to get to stay in place.


   Next you start to crinkle/roll your flower.  Take each circle and bunch it up to make your flower full.


That's it.  By the time you are done with each circle to your flower you should have a very close paper resembling a flower.


  Think of the endless possibilities now.  I used yellow and only made one but, different colors and even a bouquet of flowers in a vase.  I'm just saying bridal shower, baby shower, birthday or Mother’s Day these flowers can help decorate any area.

  I declare this a #pinterestwin!  Super easy craft. A cute flower at the end of an easy process.  Endless possibilities with colors, cuts and could even spray some scent on there.

Saturday, July 9, 2016

Cheers to my Pinterest Challenge


  I have been stalking this idea/concept for about a week.  It took me awhile to get one ingredient.  I have a hard time with stepping out of the box and trying something without it being written down, so I just kept looking for this bottle at all the stores I went in.


Today I found the last ingredient and was going to make this drink!  It is so neat to see and I want to be responsible for making it happen.  You may not be impressed but my kids will be. Lol, one point for mom is good enough for me.

Apparently this is a great science project so my homeschool friends add this to your lessons.  The more sugar the heavier the drink.  So each drink you add has to be less than the previous one.

I started with red of course.  This red juice had the highest sugar percentage so it went in the glass first and straight to the bottom.


Next up was the med level sugar content drink.  My white drink was a coconut drink.  I thought about lemonade and wasn't sure if the color would be visible so I followed the directions and picked up a coconut drink. 


Can you see it?  Because  I can see it or at least I think I can see it.  At this point I'm so excited!  I have red and white; one more level and this is a winner.


  Blue! I added the blue and it swallowed up the white. This made me sad.  I was still happy yo see the color contrast but will need to work on this drink a little more.

  I used juice on the bottom, Sobe Coconut drink in the middle and a blue Gatorade on the top.   Again the highest sugar level should be on the bottom.  I added a bit of water to the blue to offset the sugar between the white and blue maybe that's where I went wrong.  Also you need to pour carefully.  I read pour it directly over ice, use the back of a spoon to slow the pour down but, bottom line is to not pour directly on the next layer.

  I am not done with this drink.  I will be back at it tomorrow.  We shall see what happens or worse case is I will keep at it sporadically until I make it happen!

  I'm going to chalk this one up as a #pinterestwin because I had two layers then two different layers.  I just need to perfect this one and I am confident it is an easy fix.

  Go ahead and try it with or without the kids; it's a fun party trick regardless!

Friday, July 8, 2016

Pinterest Challenge Day 8


  With so many options available to you on Pinterest it's so hard to choose what to do next.  I enjoy trying new meals be it entree, snack or desserts so I look at those and save a lot of them.  The second area I look at is the teaching, learning for kids.  I work a lot with my kids and am constantly looking up new ways to teach them something specific and new ideas to reinforce what they have learned.  Last area is arts and crafts more so for them than diy projects for myself.  Crafts that I can make or that they can make is fun to watch the progress.  Usually these crafts look easier than DIY projects, are quicker and I have most everything on hand.

  Today I am sharing another project from that second area.  I had shaving cream, a pointed device (toothpick, or broken off qtip (we used skewers)) paper and food coloring available so that's a green light for creating more art.


  Spray your shaving cream on the surface.  Even it out so you have it completely smooth.

Drop random drops of food coloring across the surface; even dropping different colors, different amounts on original drops.  Next use a pointed device  to make desired patterns.


We stuck with fireworks with one child and the other child working with the other side of the tray did more of an abstract pattern.

  Place your paper over the landscape when your done swirling the colors.  Pat it nicely to ensure all paper has made contact with paper and color have set.


Remove paper and wipe the shaving cream off and behold the beauty.  I must admit I didn't think it worked when I pulled the paper off but when I cleaned that shaving cream off it was magically.  There is not a clear precise picture maybe because I left the paper on to long, too much color, shaving cream was melting.  It would be worth another try to see the results.


  You could make your own stationary.  I have used nailpolish and had great designs but this is so much cleaner.  I would even like to try it on material and fabric.  I wonder how it would work out.  It's food coloring I almost think it would be permanent but maybe it would need something to set it.

  Overall easy, cheap project to make with the kids and if your a great artist I bet you can make some awesome pictures as well.  This is a great project for kids of all ages which as you can see my two even had to share their surface as my shaving cream was limited.  So much for supplies on hand.

Definitely a #pinterestwin and even the kids declared this a fun project!

Thursday, July 7, 2016

Pinterest Day 7


   Scouring Pinterest takes longer than some projects will take you to accomplish it.  There is so many things to look at and even if you go there with a plan; sometimes a wrong turn gets you sidetracked.   You cold organization your trips to strictly food one day maybe menu plan new meals for the upcoming week, challenge yourself to a new chocolate dessert for the weekend or one fun lunch idea as I decided today.

  My kids are on a strict we decide only diet.  I am not new to this menu.  I work around this sometimes.  Breakfast and lunch are the easiest meals here.  It's dinner when the army of 2 strong start mini attacks. First verbal, then offensive comments detest in their meals.  But that's another story.  Today I gave them lunch with a flair.

  4 items are necessary for this meal.  Toothpicks, pickles, hotdog and bun!

  Based on those items do you have any idea what you could make?

  Check this out!


  You can make these cute little vehicles. I have a little boy and if he gets a daily dose of cars everyday I am the best mom ever and he is as happy as can be! So I aim to please!


  These little cars came out great and they were super easy to make.  Let me tell you a secret though.  I didn't have toothpicks so I got a little creative and used grape stalks to keep the tires on.  Hey, don't judge it worked!


My daughter is getting crafty like her mom and thought I should have used food coloring to add numbers on the side. That was a good suggestion and I will do it next time!  

This was the first time I bought bread and butter pickles and oh my goodness! Have you had them?  Yum is one word that can describe them!  

Anyways thanks for reading and I declare the a #pinterestwin! 

Tuesday, July 5, 2016

Red, white and blue (pinterest challenge day 4)


  Today's challenge was fun and I can't wait to show it off in the future at a party or get together.  This challenge already had me reflecting on my future and how I can take a dish to another level.  I used to think (well still do) that it was hard to bring a dish to pass that was sophisticated and fancy but, now I know it may take a little practice and some time but it's absolutely possible!

  All you need are three items to pull this Pinterest idea off.

 Strawberries.
Blue sprinkles and white chocolate that didn't quite make the photo opportunity.

  Melt the chocolate dip your strawberries in the chocolate and then roll them into the sprinkles. Bam, that's it!


  I present to you red, white and blue.  My daughter wolfed them down as soon as they were done.  She does like strawberries and sugar so go figure.

  Well if this doesn't motivate you on how easy some neat food art can be I don't know what could.  This one was even easier than that hotdogopus (lol).  Making him was easy standing him up on the seaweed was the hard part.